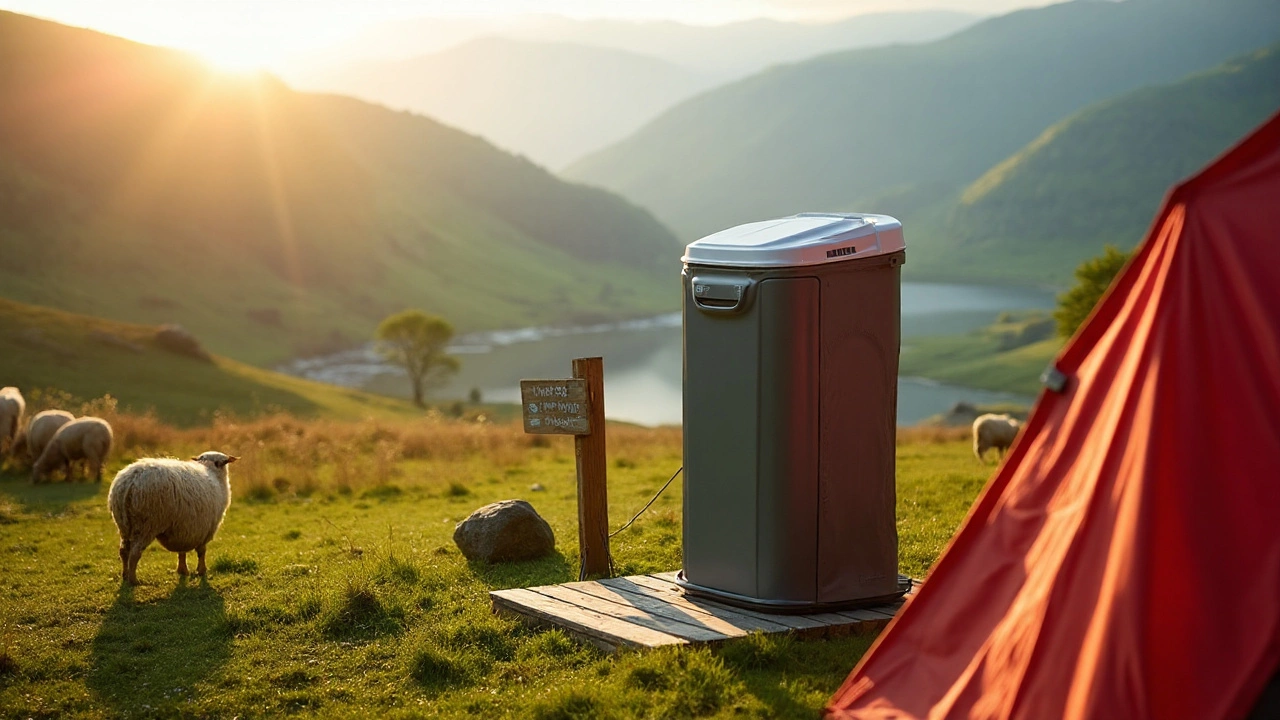
Composting Toilets in Motorhomes: Simple, Clean, and Green
If you’ve ever been stuck at a dump site waiting for a traditional toilet hookup, you know the hassle. A composting toilet can turn that frustration into a quick, odor‑less solution that works wherever you park. Below we break down how these units work, why they’re great for motorhome life, and the everyday steps to keep them running smooth.
How a Composting Toilet Works
At its core, a composting toilet separates solid waste from liquid, then lets the solids break down naturally with the help of microbes, heat, and a bit of airflow. Most models have a waste chamber, a moisture‑absorbing wick or liner, and a vent that lets gases escape quietly. You add a small amount of bulking material – usually sawdust, peat, or coconut fibre – after each use. The material soaks up moisture, keeps odors down, and gives the microbes something to feed on.
The whole process is passive; there’s no water flush, no sewage tank, and no need for a hookup to a dump point. As the waste breaks down, it turns into a dry, soil‑like material that can be disposed of at a local composting site or used (if allowed) in garden beds.
Why Motorhome Owners Choose Composting Toilets
Freedom from dump stations. You can stay off‑grid for days without hunting down the nearest waste point. That means more remote spots and fewer worries about pump‑out fees.
Eco‑friendly operation. No chemicals, no black water, and very low water consumption. If you care about leaving a light footprint, a composting unit checks that box.
Quiet and odor control. Properly maintained, the toilet stays almost scent‑free thanks to the vent and the dry medium. A quick lid close and a sprinkle of sawdust does the trick.
Cost savings. You skip the expense of a large black‑water tank and the recurring pump‑out costs. After the initial purchase, the only recurring cost is the bulking material.
Space efficiency. Modern composting units are compact and can fit under a regular bathroom sink or inside a small bathroom cabinet, freeing up valuable living space.
Everyday Maintenance Tips
1. Add bulking material each time. A handful of sawdust after each use keeps the waste dry and helps microbes do their job.
2. Stir or rotate the chamber. Many units have a lever or a simple handle to mix the waste. Do this every few days to speed up decomposition and avoid clumps.
3. Watch the moisture level. If the waste feels soggy, add more dry material. If it’s too dry, a splash of water (or a wet wipe) can balance it.
4. Vent check. Ensure the vent pipe isn’t blocked by leaves or debris. A clear vent is the key to odor control.
5. Empty when full. Most chambers hold 3‑5 gallons of solid waste. When the indicator shows it’s near full, seal the compartment and transport it to a composting site.
Following these steps means you’ll spend minutes, not hours, dealing with the toilet.
Choosing the Right Model for Your Motorhome
Look for a unit that matches your bathroom layout – front‑loading vs. rear‑loading – and check the weight. Some models are as light as 30 kg, perfect for smaller campervans. Read user reviews for reliability; a common complaint is a vent that clogs easily, so pick a brand with a removable, washable vent screen.
Also, consider whether you want a self‑venting model (no external vent pipe needed) or a traditional vent that vents outside. Self‑venting units are convenient for tight spaces but may need more frequent maintenance.In short, a composting toilet can change the way you travel. It gives you the freedom to park in remote spots, cuts down on waste fees, and lets you enjoy a clean bathroom without the mess of a black‑water system. Follow the simple upkeep steps, pick a model that fits your motorhome, and you’ll be ready for endless road‑trip adventures with a greener, quieter bathroom experience.
 Sep 24, 2025
Where to Go to the Bathroom When Camping - Your Complete Guide
Discover the best bathroom solutions for camping, from portable toilets to cat holes, with practical tips, comparison tables, and LeaveNoTrace advice.